Dr. Riley Clark discusses improved workflow due to digital technologies and a skilled lab
When patients opt for implant-supported prosthetic rehabilitation, their questions focus most frequently on prosthetic implications, not the implant surgery. Questions arise, such as: “Am I going to leave surgery with teeth? What will the teeth look like? How will the teeth function?” Fortunately, a digital workflow allows implant-ologists to give patients not only predictable surgical outcomes but also a familiar temporary on the day of surgery.

Figure 1: CS 8100 3D 8×9 FOV at 150μ
With today’s technology and with a good lab, the implant dentist can not only plan the ideal implant position relative to osseous boundaries but also complement those implants with milled abutments and provisionals. Perhaps the most compelling aspect is that these processes can occur days before the surgery even happens. Nothing highlights this technology and its potential better than an anterior esthetic case as will be demonstrated in this review.
A 44-year-old male presented with complaints of pain and pressure around an existing bridge from teeth Nos. 6-10. The patient received recommendations from colleagues to seek out treatment at WhiteCap Institute due to its capabilities in using technology to plan for immediate placement of dental implants and provisional crowns. After a clinical exam, decay was found on tooth No. 6, which was supporting the bridge. The tooth would need to be extracted. The patient worked in a highly visible position and was hesitant to settle for teeth that weren’t perfect and did not like the idea of a long span bridge involving more abutment teeth. He opted for an implant-supported bridge using three implants.
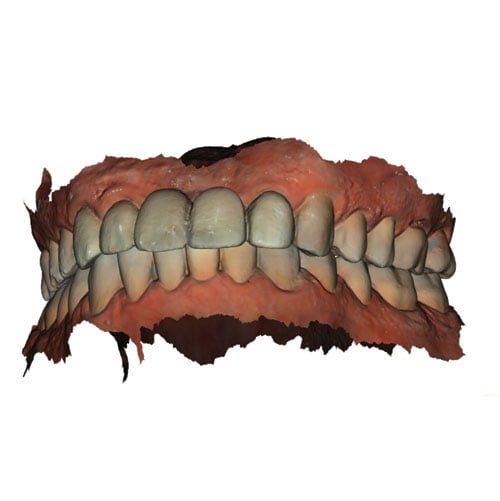
Figure 2: Digital impression taken with a CS 3600 intraoral scanner
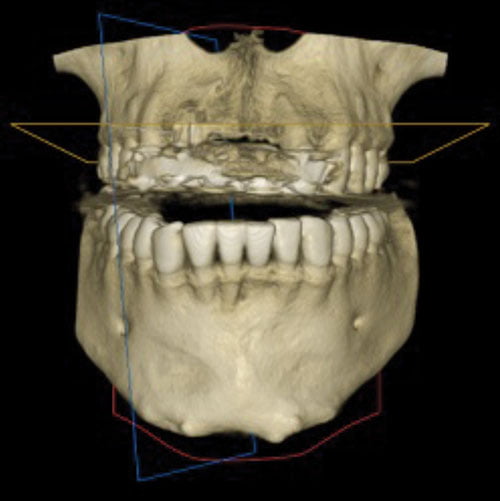
Figure 3
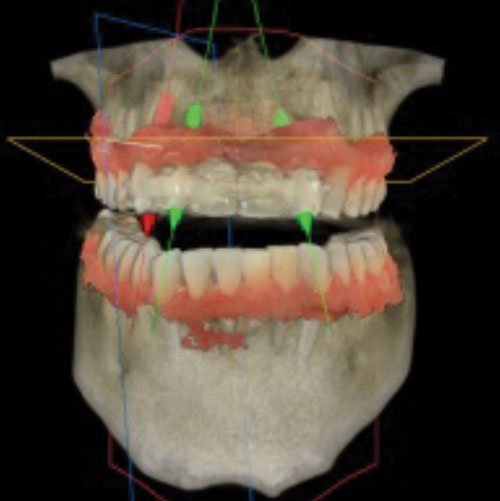
Figure 4
A CBCT scan was captured with a CS 8100 3D system (Carestream Dental) (Figure 1), and a digital impression was taken with a CS 3600 intraoral scanner (Carestream Dental) (Figure 2).
The patient’s CBCT (DICOM) file was merged with the STL file produced by the CS 3600 using Carestream Dental’s Prosthetic-Driven Implant Planning module (Figures 3-4).
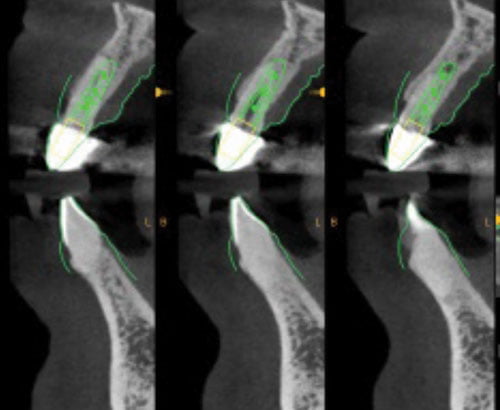
Figure 5
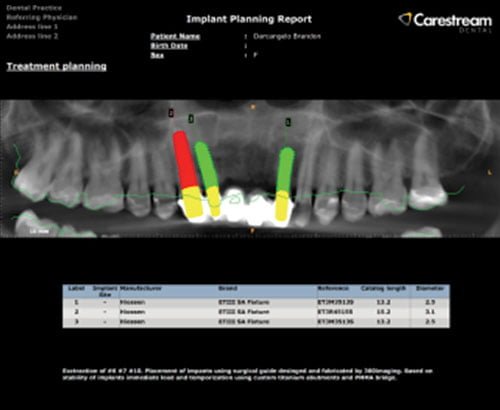
Figure 6
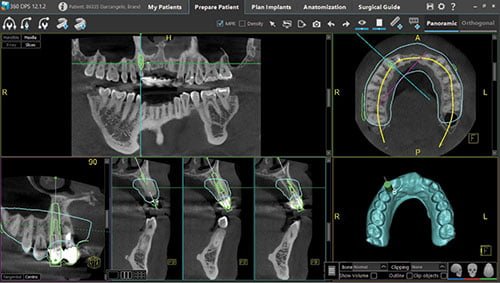
Figure 7
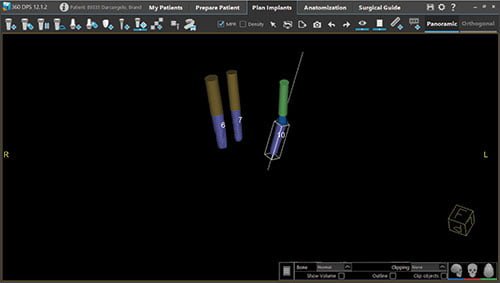
Figure 8

Figure 9
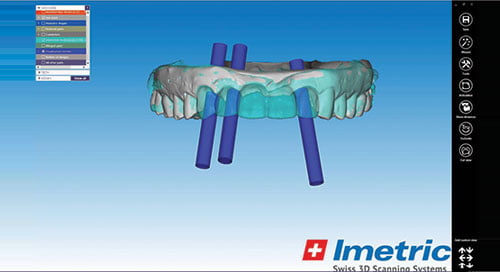
Figure 10

Figure 11
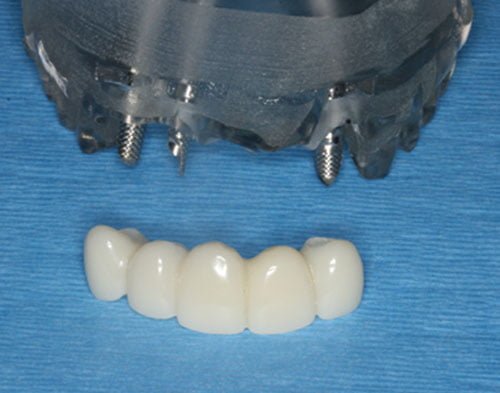
Figure 12
The implant position was then digitally planned (Figures 5-6).
These files were exported to WhiteCap Dental Lab and Milling, which utilizes 360imaging® software to plan and fabricate surgical guides (Figure 7). Implant locations are shown through the simulated surgical planning software (Figures 8-9). This data was merged with prosthetic planning software (exocad) (Figure 10) from which an immediate fixed provisional bridge was designed (Figures 11-12). The interface of these technologies allows not only precise implant placement planning, but also the fabrication of capable and esthetic temporaries.
Treatment
On the day of the surgery, blood was drawn and processed following the Endoret® (prgf®) protocol (BTI®). An IV line was placed, and the patient sedated to a light/moderate level; 4% Septocaine® 1:100k epi was administered to the anterior maxilla for local anesthesia.
The first task was to section the bridge between teeth Nos. 6 and 7 and then between teeth Nos. 7 and 10. Abutment teeth Nos. 6, 7, and 10 were extracted following an atraumatic protocol in order to preserve the buccal plate and other periodontal tissues. The lateral incisors were extracted quickly and uneventfully. However, tooth No. 6 needed to be sectioned to remove it with minimal pressure and trauma to its supporting structures (Figure 13). The sectioning of single-rooted teeth is helpful for atraumatic exodontia when traditional methods prove fruitless. A small periapical cyst was discovered on tooth No. 7. A fair amount of time was spent between irrigation and manual/rotary debridement to remove any cystic remnants. Often a rotary instrument, such as a Lindemann bur, at the apical end of the extraction is the best approach for apical debridement.
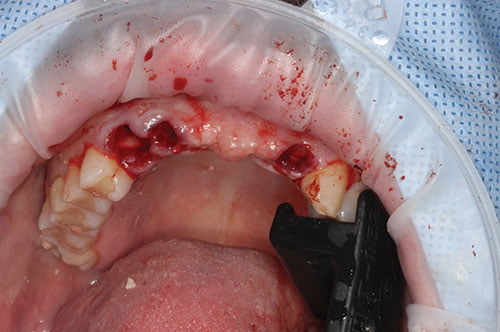
Figure 13
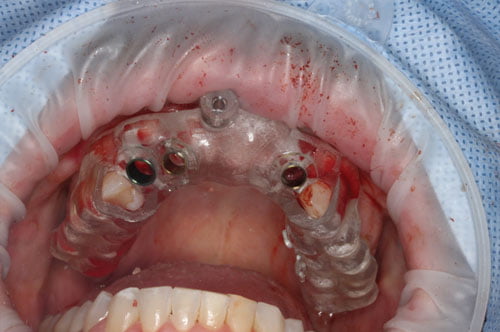
Figure 14
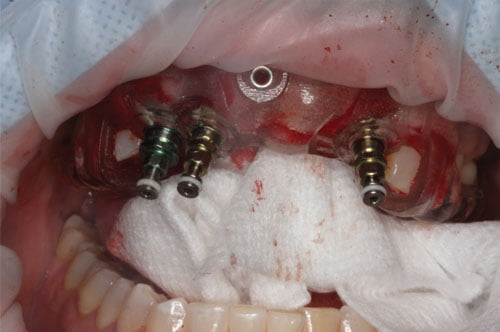
Figure 15
At that point, the surgical guide was placed, and proper fit was confirmed (Figure 14). A fixation pin in the anterior portion was placed to add extra stability to the guide during drilling.
The designated drilling sequence was followed with a special focus to not oversize the osteotomy. Immediate placement of implants requires distinct attention during drilling to achieve primary stability. Without initial stability, the implants would have needed to follow a two-stage protocol, and no fixed temporary could have been indicated the day of surgery.
After the osteotomy drilling, the surgical guide was removed, and a 50/50 mixture of bovine bone and cadaver bone that had been embedded in the PRGF mixture was placed into the extraction areas, mainly against the buccal plate. Then the surgical guide was seated, and the three implants were placed through the surgical guide using a special mount to ensure proper position within the guide (Figure 15). Initial stability was achieved on every implant. The surgical guide was removed, and supplemental bone grafting was performed where needed.
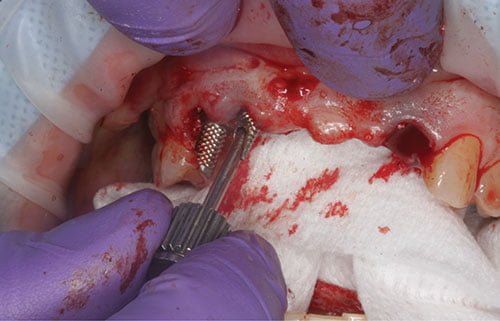
Figure 16
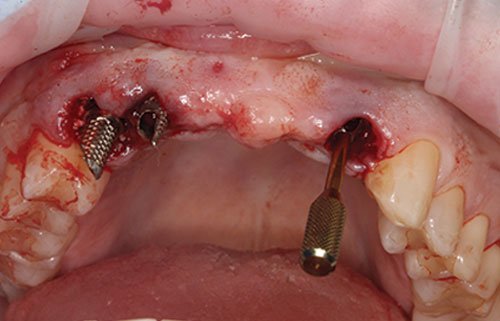
Figure 17

Figure 18
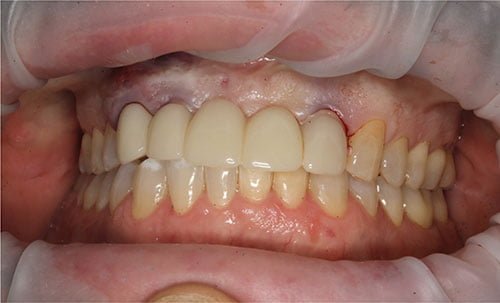
Figure 19
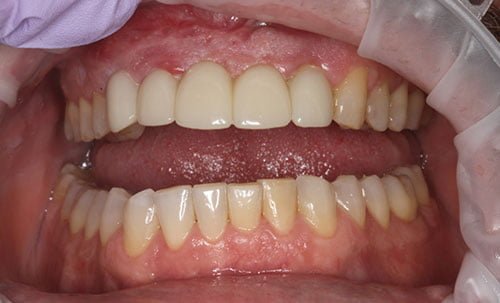
Figure 20
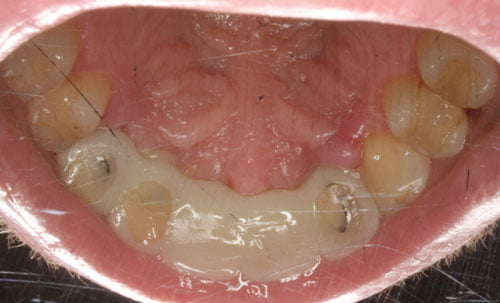
Figure 21
Tooth No. 10 had a special task to ensure that the rotational component of the implant was ideal for a 17º multi-angled abutment. The abutment was tried in; the angle was slightly off, so the implant was rotated 10º to 15º; and the abutment was tried in again (Figure 16). The new angle fit the profile we were hoping to achieve. Lab-prepped temporary cylinders were placed direct to implants on teeth Nos. 6 and 7. No. 10 cylinder was placed on the multi-unit abutment following the corrected 17º angle, maximizing parallelism between all abutments (Figure 17).
At that point, it was confirmed that the PMMA temporary could fit passively over all three abutments (Figure 18). After confirming a good fit and occlusion, PRGF fibrin membranes were placed around the temporary abutments.
A luting agent was used to adhere the PMMA bridge to the abutments. Small holes and voids were filled in. The occlusion was checked and the bite adjusted to avoid anterior collision with the temporary (Figures 19-21).

Figure 22
The out-of-town patient returned the following day for a post-op visit to check bite and initial patient response (Figure 22).
After 3 months of healing, the patient will return to have another digital impression taken with the CS 3600 for the restorative phase.
 Riley Clark, DMD, completed his bachelor’s degree in biological sciences at Portland State University and then moved to Cleveland, Ohio, for his DMD program at Case Western Reserve University. Shortly after graduation, he attended advanced training in anesthesia. Professionally, Dr. Clark takes great pride in optimizing clinical efficiencies and digital workflows. He spends the majority of his time in private practice doing full-mouth dental implant rehab. He also teaches and mentors at WhiteCap Institute. He acts as a consultant to WhiteCap Dental Lab and Milling, where he focuses on full-mouth treatment sequencing and digital workflows in preoperative procedures and final restorative procedures. Dr. Clark is passionate about dentistry and transforming patients’ lives through their smiles with dental implants.
Disclosure: Dr. Clark is a key opinion leader for Carestream Dental.
Stay Relevant With Implant Practice US
Join our email list for CE courses and webinars, articles and mores

