Dr. David Little discusses how digital technology opens up a myriad of treatment options
As a general practitioner who has been involved with implants since 1984, I’ve come to realize that patients don’t want implants, they want teeth. That’s why beginning a single-tooth implant case — which the majority of implant cases are — with the final restoration in mind is so crucial to success: both the success of the implant and the success rate of case acceptance. Fortunately, using an integrated digital workflow at my practice allows me to offer patients solutions that take them from implant to final restoration. The key I’ve found is advanced 3D technology that not only helps me visualize anatomy, plan and place implants, and restore teeth with confidence, but also plays a key role in patient education and case presentation.
The technology
When it’s determined that a patient will need an implant, the typical workflow in my practice includes the following:
- Thorough clinical exam, including radiographs and intraoral photographs (CS 1500, Carestream Dental)
- CBCT scan (CS 9300C, Carestream Dental)
- Digital impression taken with an intraoral scanner (CS 3600 intraoral scanner, Carestream Dental)
While each link in this interconnected digital chain provides valuable information for planning the case, the CBCT system allows for exceptional high-resolution 3D views of the bone so that I can evaluate the implant site. I’ll also be the first to admit that my CBCT system lets me know when more complicated cases should be referred out to a specialist. The key is confidence — whether that’s the confidence to handle the case in-house or confidence in knowing I made the best decision for the patient by referring them to a specialist.
While I’ve always made CBCT a priority in my implant workflow, a more recent addition is the intraoral scanner. Although intraoral scanners are still new to the field of implants, they bring with them several advantages. The scanner gives me flexibility when working with custom healing abutments and surgical guides, and the ability to scan the same implant region of interest twice — once with scan body in place and then again with healing cap present — streamlines the process and saves valuable chair time. Introducing the CS 3600 intraoral scanner to my implant workflow has also cut back significantly on impression materials and turnaround time with the lab.
The consultation
Using digital technology opens up a world of treatment options to the clinician, but those options can sometimes overwhelm patients. As previously mentioned, patients just want a tooth that’s going to look natural — the pros and cons of a custom abutment isn’t always their top priority. One way to boil things down for patients is to present a single-tooth case fee — which includes the diagnostics, the surgery, the type of restoration, etc. — and package that into one solution for the patient. I find it works better from a case presentation standpoint and aids in acceptance when the clinician can say: “The solution to take care of your tooth is X amount.”
The treatment plan
After the patient has accepted treatment, we follow our typical implant treatment workflow, using the CBCT scan and digital impression that were were acquired in the diagnostic stage. In the most “ideal” case, Implant Concierge™ (San Antonio, Texas) merges the CBCT’s DICOM files and the intraoral scanner’s .STL files, so I can easily see where the teeth are and where I want the final prosthesis to be. When planning with the end result in mind, the clinician can make a treatment plan with greater confidence and success. The .STL files are also used to fabricate a surgical guide for atraumatic surgery and to ensure implants are placed in the perfect position.
The restoration
Once healing has taken place, there are several restoration options for single-tooth implants. A stock abutment allows the clinician to select the abutment chairside after measuring tissue height and checking for occlusal clearance. Then the abutment can be torqued into place and can be treated like a crown-and-bridge impression.
Taking a fixture level impression allows a more “hands-off” approach for implant transfer. Using either a closed or open tray, the impression can be sent to the lab for the technician and clinician to select a custom titanium or zirconia abutment and fabricate the crown. Another option is to use a screw-retained restoration using a Ti-base abutment.
The third, and in my opinion the most ideal, option is to place a scan body and capture a digital impression with the intraoral scanner. The data sets from the scan gives the clinician the ability to customize the abutment, which leads to more options for restorations — screw-retained restorations, customized abutment, and a cement-retained crown, etc.
The patient
I have found that implant patients tend to be the most satisfied patients, and the more implants I place, the more implants I place; i.e., happy implant patients spread the word. In fact, I recently had a patient who came to me on two different occasions for single implants in two different areas.
First, the 71-year-old male patient presented for treatment with pain in the lower right quadrant. A thorough clinical exam was conducted, and a PA and CBCT scan were taken (Figures 1-2). The diagnosis was a fractured root of the lower right first premolar. Options were discussed with the patient, including root canal, buildup; crown lengthening and crown; or extraction and single-tooth implant placement with abutment and crown. The patient previously had implants, showed a high dental IQ, and preferred implant treatment as the solution.
Using the CS 3600, a digital impression was created so that .STL files could be merged with the CBCT DICOM files for implant planning and fabrication of a surgical guide by a third-party lab. Once the surgical guide was returned from the lab, an OsteoReady performance implant 11.5 x 5.0 was placed (OsteoReady® Practical Implant Solutions, Concord, Massachusetts) and a PA was taken to confirm proper placement (Figure 3) and confirmation of seated healing abutment. The OsteoReady System was chosen because it is a high-quality simple system with flexible restorative options.
After healing for 3 months, the abutment was removed (Figures 4-5), and the area was scanned with the CS 3600. Next, a scan body was placed (Figure 6) and a second digital impression taken.
Figure 1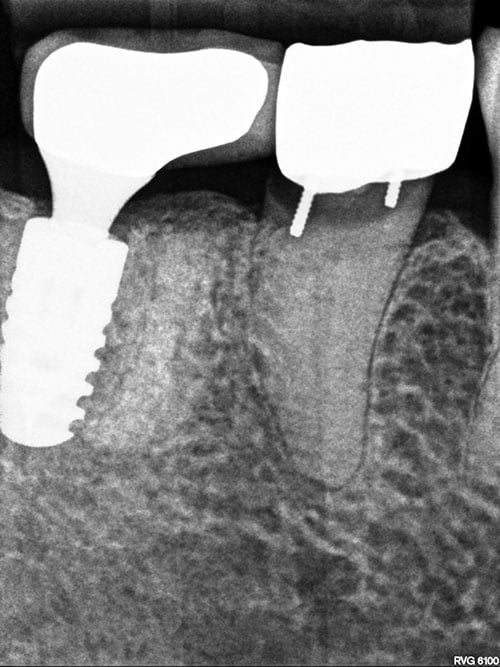
Figure 2
Figure 3
Figure 4
Figure 5
Figure 6
Figure 7
Figure 8
Figure 9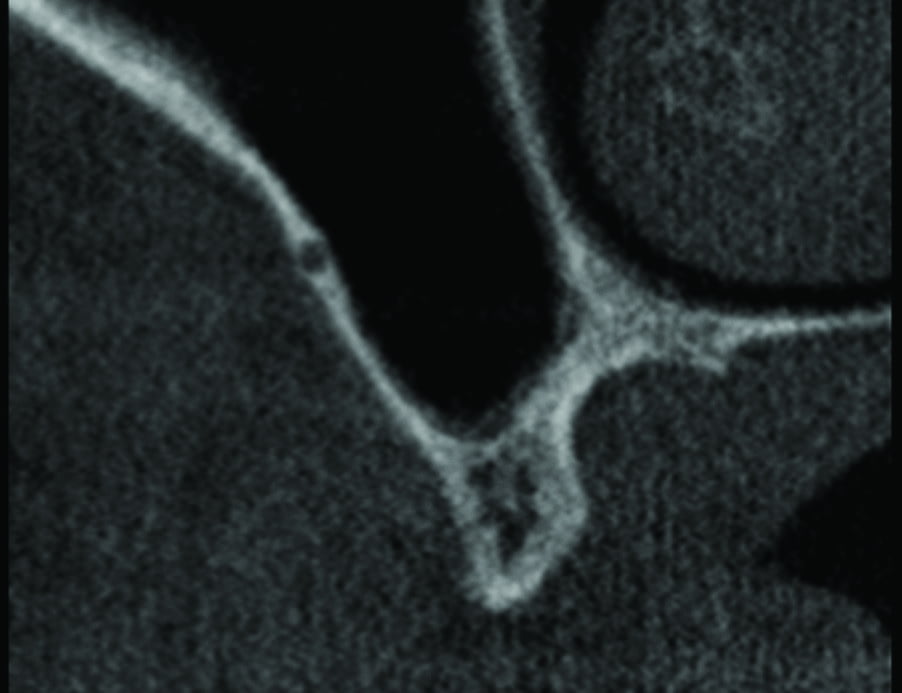
Figure 10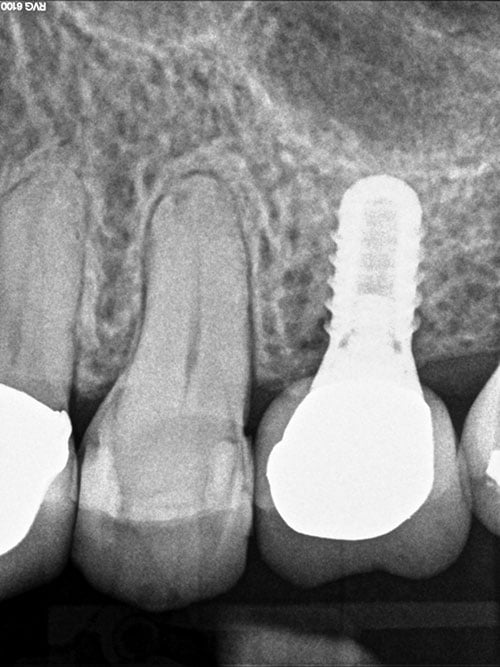
Figure 11
Figure 12
With these digital impressions, a custom abutment and crown were created from the printed model, and the restoration was successfully placed (Figures 7-10).
When the patient was later experiencing pain in the upper left quadrant, he returned for consultation. The reliability of digital technology and the accuracy of surgical guides allowed me to take a very similar approach as the first implant.
Radiographs were taken with a Carestream Dental RVG intraoral sensor (Figure 11). Tooth No. 13 was fractured and non-restorable. The patient opted to extract the tooth and go with a single-tooth implant. Tooth No. 13 was extracted, thoroughly curetted, and grafted with freeze-dried allograft (BaseBone™, Concord, Massachusetts) (Figure 12).
After 3 months of healing, a CBCT scan (Figure 13) was taken with the CS 9300C and merged with a digital impression from the CS 3600 intraoral scanner, and a surgical guide was fabricated by Implant Concierge™ (Figure 14). In this case, a 4.2 mm x 13 mm performance implant (OsteoReady® Practical Implant Solutions, Concord, Massachusetts) was placed (Figures 15 and 16). The implant had good primary stability, and it was decided to place a healing abutment to complete the first-stage surgery.

Figure 13
Figure 14
Figure 15
Figure 16
Figure 17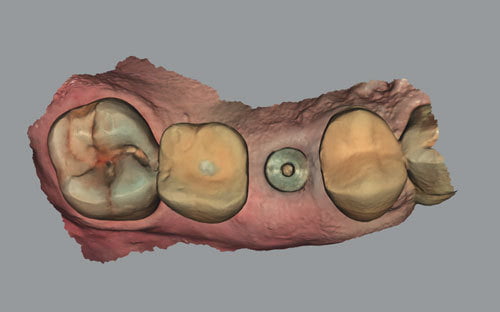
Figure 18
Figure 19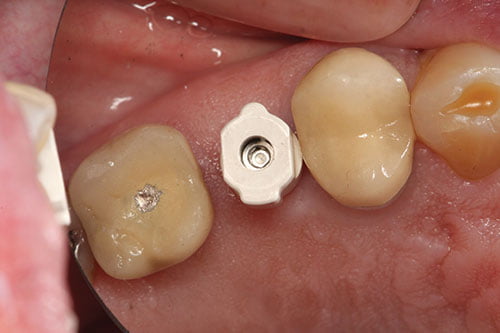
Figure 20
Figure 21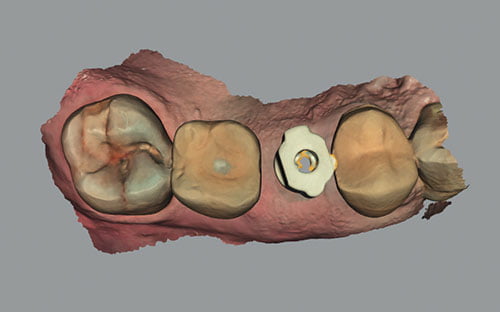
Figure 22
Figure 23
Figure 24
Figure 25
Figure 26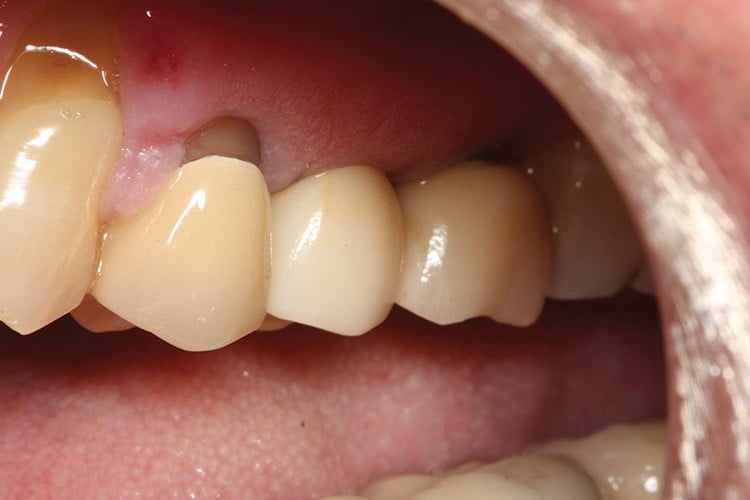
Figure 27
Figure 28
Figure 29
After 3 months of osseointegration, the healing abutment was scanned with the CS 3600 (Figures 17 and 18) and then removed (Figure 19) and a scan body placed (Figure 20). A PA was taken to verify seating (Figure 21). The scan body was scanned with the CS 3600 (Figure 22).
For educational purposes, three restorations were fabricated by Watson Dental Lab, Austin, Texas, to show the restorative options for the single-tooth implant — stock abutment (Figure 23), custom abutment (Figure 24), and screw-retained Ti-base abutment (Figure 25) — before seating the final restoration (Figures 26-29).
The results
A digital workflow allows me to offer patients everything they need from implant to restoration in one practice. A “full package” of digital 3D technology also lets me make a diagnosis, place implants, and restore teeth with confidence. Perhaps more than a natural-looking tooth, that’s what patients want most from their doctor — confidence to handle their case with the care it deserves.
Stay Relevant With Implant Practice US
Join our email list for CE courses and webinars, articles and mores

